Why Your Daily Commute Causes Back Pain and How to Fix Your Driving Posture
The Hidden Physical Toll of Your Daily Drive
Morning stiffness that appears before the workday has started is often blamed on age, stress, or a bad night”s sleep. For many daily commuters, however, the car itself is part of the problem. A long drive can leave the lower back aching, the hips tight, and the neck heavy before the first meeting begins. If driving consistently makes symptoms worse while standing or walking brings relief, the commute deserves closer attention. Even basic changes, such as reviewing proper driving posture, can make a meaningful difference.
A car seat is not simply an office chair with a seat belt. In an office, you can stand, shift your weight, move your feet, and adjust the desk independently. Behind the wheel, your pelvis is confined, your legs operate pedals, your hands maintain control, and your eyes must remain focused on traffic. Stop-and-go driving adds another challenge: the body remains mostly still while repeated acceleration, braking, road imperfections, and vibration pass through the vehicle. That combination creates static spinal loading with a constantly changing mechanical stimulus.

Understanding the Biomechanics of Driving Strain
Whole-body vibration begins at the tires and suspension, then travels through the seat into the pelvis and spine. A rough road, worn suspension component, poorly adjusted seat, or prolonged ride can increase the amount of vibration reaching the driver. The body instinctively braces against this movement, especially when the torso is slouched or unsupported. Over time, that bracing can fatigue the muscles around the lumbar spine and hips. Vibration does not automatically cause injury, but it can amplify the discomfort created by an already poor position.
Pedal operation also creates an uneven load. Most vehicles require the right foot to move repeatedly between the accelerator and brake, while the left leg remains relatively still. This single-foot pattern can encourage the pelvis to rotate or shift, particularly when the driver reaches too far forward or sits slightly off-center. The resulting asymmetry may be felt as one-sided lower-back tension, hip tightness, or irritation extending into the buttock and leg. A wallet or phone in a back pocket can make the imbalance worse by lifting one side of the pelvis and narrowing space around sensitive tissues.
Neutral sitting distributes pressure more evenly. The tailbone is supported by the seatback, the natural curves of the spine are maintained, the hips are level with or slightly higher than the knees, and the feet can operate the pedals without reaching. Driving stress appears when the body must compensate: the pelvis slides forward, the shoulders round toward the wheel, the head moves ahead of the torso, and the lower back loses support. The comparison below shows why a small cockpit adjustment can have a large effect over a five-day commute.
| Neutral rest position | Common driving stress |
|---|---|
| Pelvis square and supported against the seatback | Pelvis twisted, slid forward, or tilted by a back-pocket object |
| Hips level with or slightly higher than knees | Knees raised sharply or legs stretched toward the pedals |
| Spine supported with a natural lumbar curve | Lower back rounded, unsupported, or held rigidly |
| Shoulders relaxed with elbows comfortably bent | Arms reaching forward and upper shoulders braced |
Dialing In the Driver Seat from the Ground Up
Seat adjustment should begin with the driver seated squarely, not leaning toward the door or reaching for the controls. Return the steering wheel and seat to a neutral starting point, then adjust the seat before fine-tuning the wheel and mirrors. The goal is not to copy another driver”s position. Different body lengths, vehicle designs, and visibility requirements matter. The target is a balanced position that keeps the pedals easy to use, maintains a clear view, and supports the spine without restricting safe control.
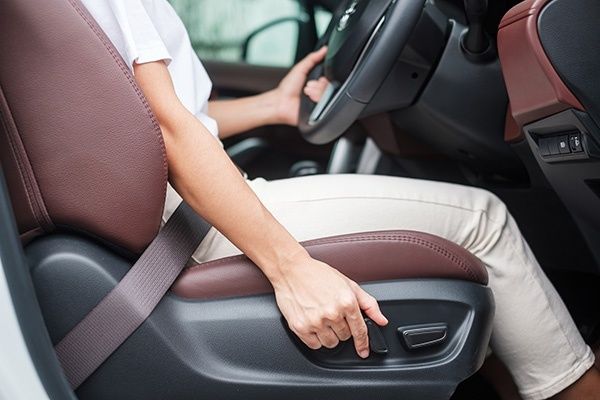
- Set seat height first. Raise or lower the seat until the road and instrument panel are easy to see without lifting the shoulders or compressing the hips. The hips should be level with, or slightly higher than, the knees. Leave enough clearance above the head and ensure the front edge of the cushion lightly supports the thighs without pressing behind the knees.
- Adjust forward and aft distance. Move the seat so the pedals can be fully depressed while the knees remain slightly bent, generally around 20 to 30 degrees. The legs should not lock straight, and the hips should not lift away from the cushion when braking firmly. A position that requires ankle stretching or repeated reaching is too far away.
- Set the seatback recline. Aim for an angle of roughly 100 to 110 degrees between the seat cushion and seatback. This modest recline supports the natural spinal curves while avoiding the collapsed posture created by excessive slouching. The tailbone should remain against the seatback, and lumbar support should fill the lower-back gap without forcing the ribs forward.
- Position the head restraint. The restraint should sit directly behind the skull, not low behind the neck. Its height should place the top of the restraint near the top of the head when possible, with minimal horizontal distance between the back of the head and the restraint. This is primarily a safety adjustment, but it also discourages the head-forward posture that contributes to neck fatigue.
Once the seat is set, confirm that the front edge does not restrict circulation behind the knees and that the seat belt crosses the center of the chest and pelvis. If the built-in lumbar support is too aggressive or does not reach the right location, a small, firm towel can provide a temporary solution. Avoid thick cushions that raise the pelvis excessively or interfere with the seat belt. Seat adjustment should always be completed while parked, and the steering wheel must be locked securely after positioning.
Steering Wheel Reach and Mirror Calibration for Upper Body Relief
The steering wheel should support control without pulling the shoulders forward. A useful wrist-drape test is to sit back with the shoulder blades touching the seatback and place the wrist over the top of the wheel. The wrist should reach the rim without the torso leaning forward. When both hands return to a comfortable 9-and-3 position, the elbows should remain bent and the shoulders relaxed. The commonly recommended distance between the chest and steering wheel is approximately 10 to 12 inches, or 25 to 30 centimeters, which also preserves airbag clearance.
Adjust the wheel”s tilt and telescoping range after the seatback and distance are set. The rim should not block the main gauges, and it should not force the hands too high or too low. A lower, closer wheel can make the arms feel relaxed, but it must not interfere with leg movement or reduce the driver”s view. Grip the wheel firmly enough for control, not so tightly that the forearms and upper trapezius muscles remain contracted throughout the commute.
Mirrors should be calibrated to reduce both blind spots and unnecessary neck movement. The cabin mirror should show the traffic area directly behind the vehicle. Following the Society of Automotive Engineers approach described by Car and Driver”s mirror guide, angle each outside mirror outward until its viewing area just overlaps the edge of the rearview mirror”s coverage. The position may initially feel unfamiliar because less of the vehicle”s side is visible, but it reduces duplicated views and helps limit repeated shoulder craning.
- Adjust mirrors only after the seat and steering wheel are finalized.
- Keep the rearview mirror centered on the rear window rather than tilted toward one side.
- Set side mirrors far enough outward to cover adjacent lanes without duplicating the cabin mirror.
- Still perform a quick blind-spot check before changing lanes, especially in unfamiliar vehicles or heavy traffic.
Practical Habits to Counteract Commute Fatigue
Even a well-adjusted cockpit cannot make prolonged immobility harmless. Movement should be built into the drive without distracting from traffic control. During a stationary red light, gently flatten the lower back against the seat for a moment, release it, and repeat several times. This small pelvic tilt changes pressure through the lumbar area. Shoulder blade retractions, performed by drawing the shoulders gently back and down rather than shrugging, can also interrupt the rounded posture that develops during traffic jams.
Do not use a wallet, phone, or bulky object in a back pocket. It can tilt the pelvis for an hour or more and may increase pressure around the buttock and sciatic nerve. Once parked, take a brief micro-break before walking into work or home. Stand upright, walk for a few minutes, rotate the ankles, roll the shoulders, and perform a gentle hip-flexor or hamstring stretch. For longer trips, plan a proper stop about every two hours, with approximately 15 minutes of movement when conditions allow.
- Use red lights for gentle pelvic tilts only when the vehicle is fully stopped.
- Relax the steering grip and check that the shoulders are not creeping toward the ears.
- Remove bulky items from both back pockets before starting the engine.
- After parking, walk briefly before sitting again at a desk or on a couch.
- Seek clinical assessment if pain radiates down one leg, causes numbness or weakness, or continues despite posture changes.
Take Control of Your Commute and Reclaim Your Comfort
Reducing driving-related pain starts with treating the vehicle as an adjustable work environment. Set the seat height so the hips are supported and the thighs have clearance. Move the seat close enough for relaxed pedal control, recline the backrest modestly, and place the head restraint behind the skull. Then bring the steering wheel within comfortable reach, keep the elbows bent, and position the mirrors so traffic can be monitored without constant neck craning.
These changes may appear minor, but they are repeated every day. A pelvis that remains square, a lumbar curve that stays supported, and shoulders that do not brace against the wheel can reduce the accumulated strain of thousands of commuting miles. Spend ten minutes resetting the vehicle while parked before the next commute, then reassess comfort after a week. If significant pain persists, worsens, or includes neurological symptoms, professional medical or physical-therapy advice is the appropriate next step.